|
|
|
|
|
|
|
|
|
|
|
|
The plumbing was reasonably simple to do once
we'd decided on the floor plan and the best
location of the tanks. I hope to add an external
shower at the rear drivers side at some stage in
the future. This will be to wash ourselves down
after swimming or bushwalking in warmer weather. A
motorhomer I spoke to had one installed on the
passenger side and he regretted it saying that it
would be better on the other side so that the area
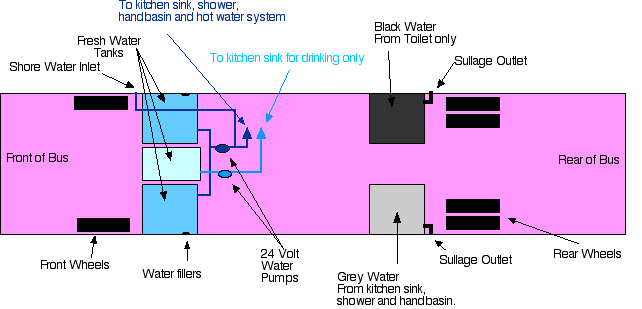
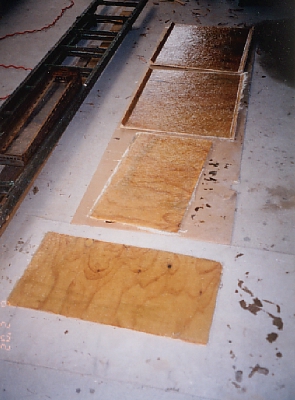
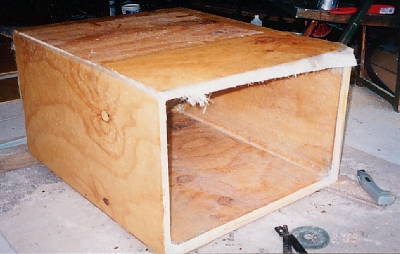
near the door and awning side is kept dry. The tanks sections laid up in
fibreglass. Tank sections partially assembled. The four larger tanks are made from 7mm ply
laminated inside and out with fibreglass. Insides
have 3 layers of 450gram glass and the outsides
have 2 layers of the same glass mat impregnated
with vinylester resin. Each tank is approx 190
litres. I have installed an 86 litre plastic tank
for drinking water only located between the two
larger tanks. I would like to have been able to
afford stainless tanks but the cost was far too
great at this stage. We chose to spend money on
those things that are difficult to upgrade later
such as the windows and the electrics. We hope in
the future to replace the tanks with stainless
ones, unless of course the fibreglass ones appear
to be doing the job adequately. As an indication
the stainless tanks were quoted at around $800 each
whereas I made the fibreglass tanks for under $70
each plus fittings. All tanks are located in the underfloor
bins.
The diagram below is not to scale but locations are close.